Free shipping from 150€ (ES) - 350€ (Worldwide)

Currency

Cart 0

Congratulations! Your order qualifies for free shipping You are €200 away from free shipping.
Sorry, looks like we don't have enough of this product.

Add order notes
Pair with
Subtotal Free
View cart
Shipping, taxes, and discount codes are calculated at checkout
Wiki · Quick setup

From the box to mining in 10 minutes

The fastest way to get any Bitaxe or Nerd*axe miner up and running. All you need is its power supply and a mobile phone.

  • Under 10 minutes
  • Just a phone
  • Bitaxe and Nerd*axe
← Back to the Wiki
Before you start

Check you have everything

What you need

What you need

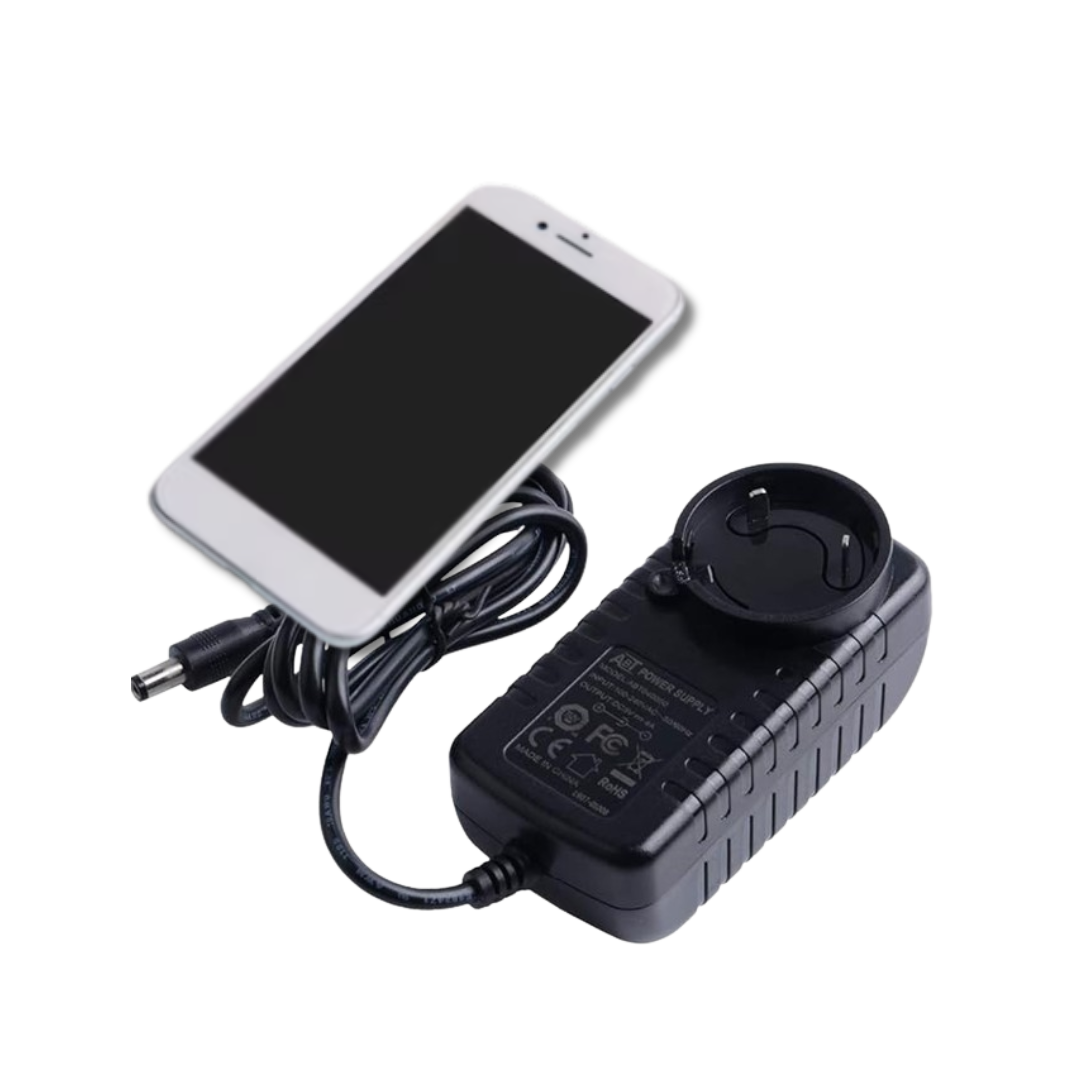
Only the power supply of your miner and a mobile phone.

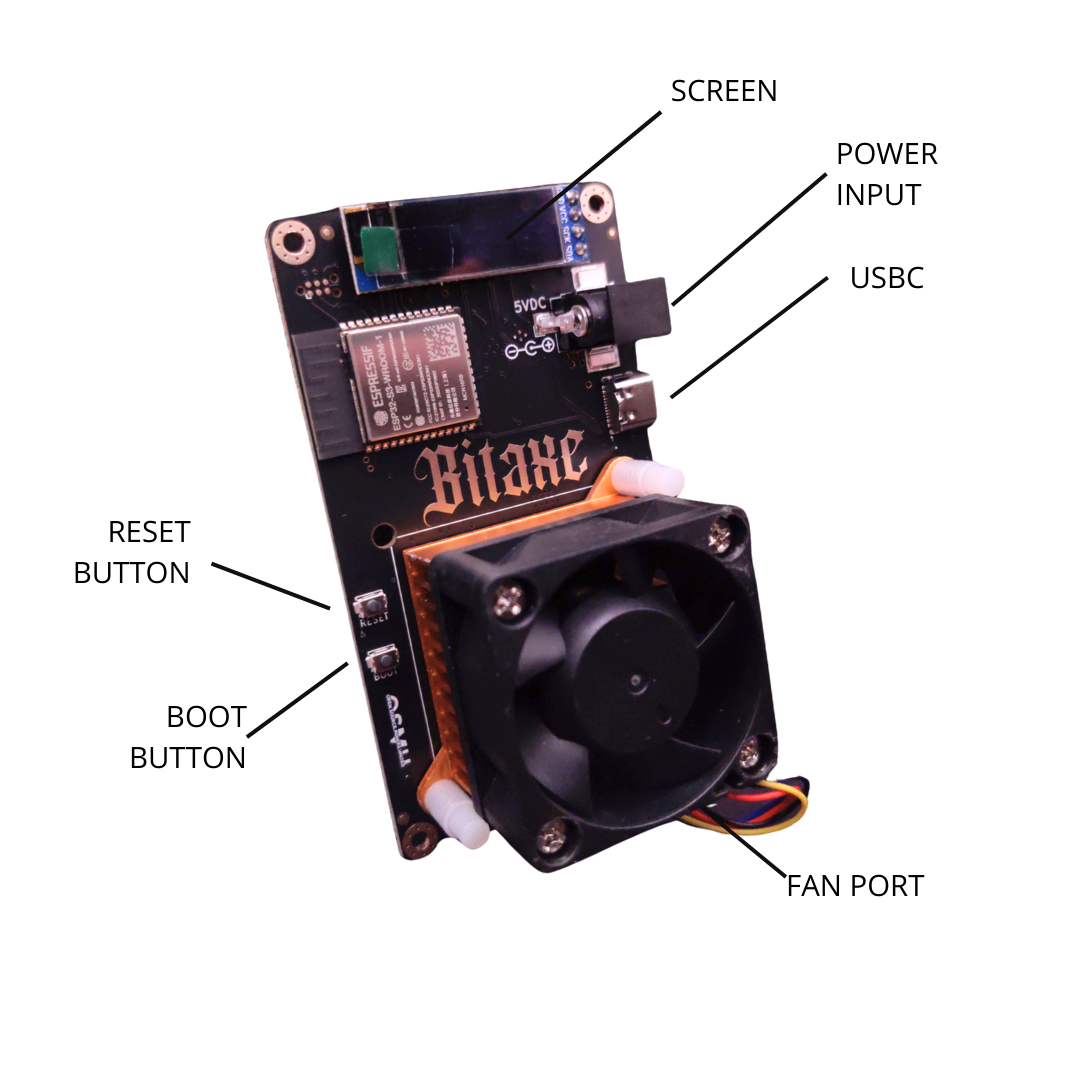
Bitaxe devices

Bitaxe devices

All Bitaxe miners with the standard board form factor, from 201 to 602.
Nerd*axe devices

Nerd*axe devices

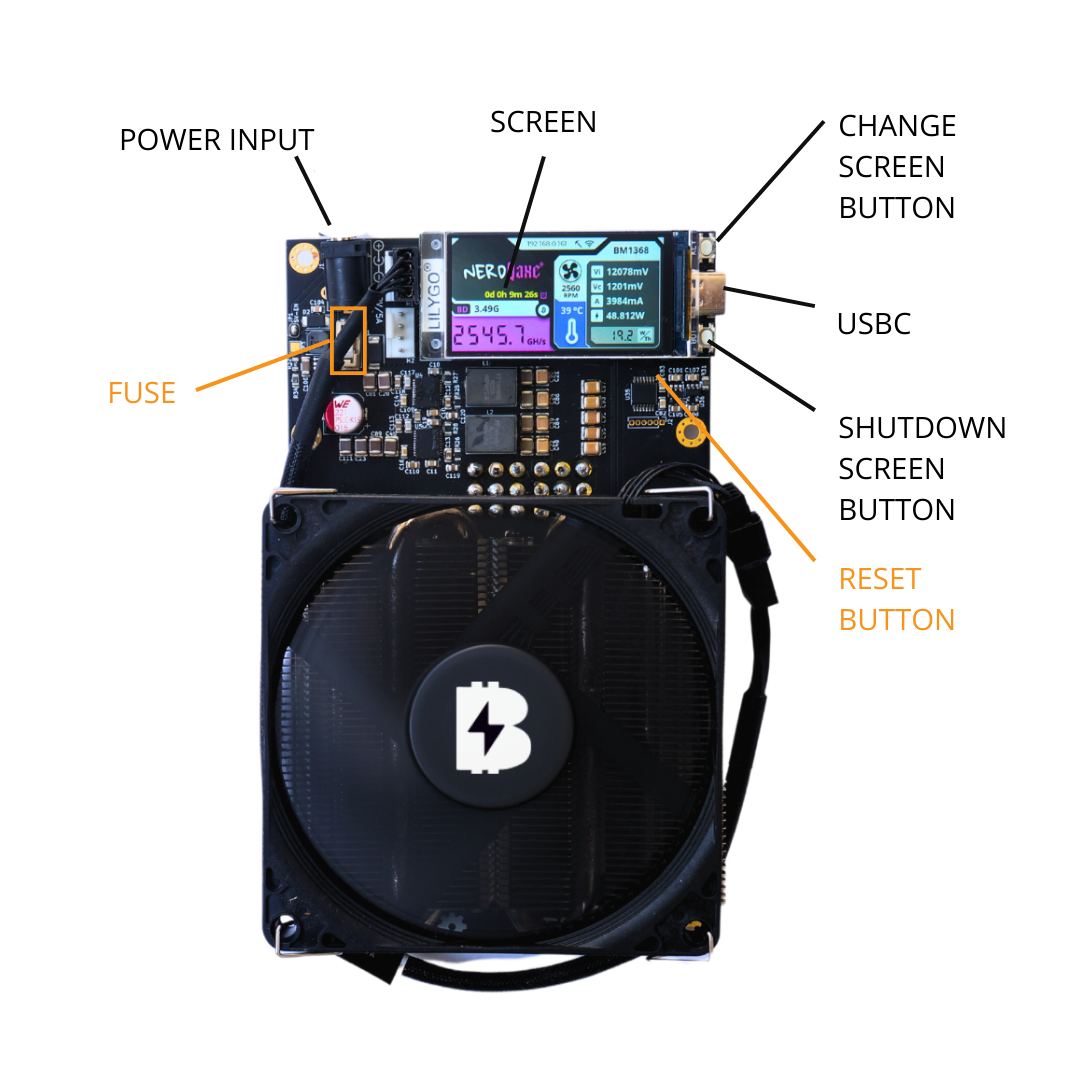
All the nerd-style miners that use the LilyGo T-Display S3 screen.

Setup

Three steps and you are mining

The steps are practically the same on a Bitaxe, a Nerdaxe or any other of these home miners.
Power it up and connect to its Wi-Fi
Step 1

Power it up and connect to its Wi-Fi

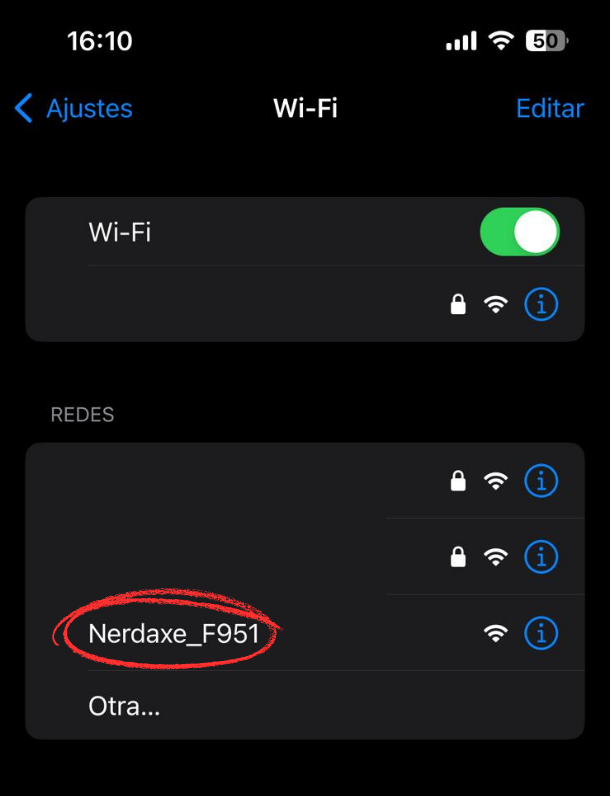
Plug the miner into its power supply. When the screen shows “Connect to ssid: Nerd*axe_XXXX” (Bitaxe_XXXX on a Bitaxe), look for that Wi-Fi network on your phone and connect to it. The setup portal opens by itself.

Use the power supply made for your miner, not any other adapter.
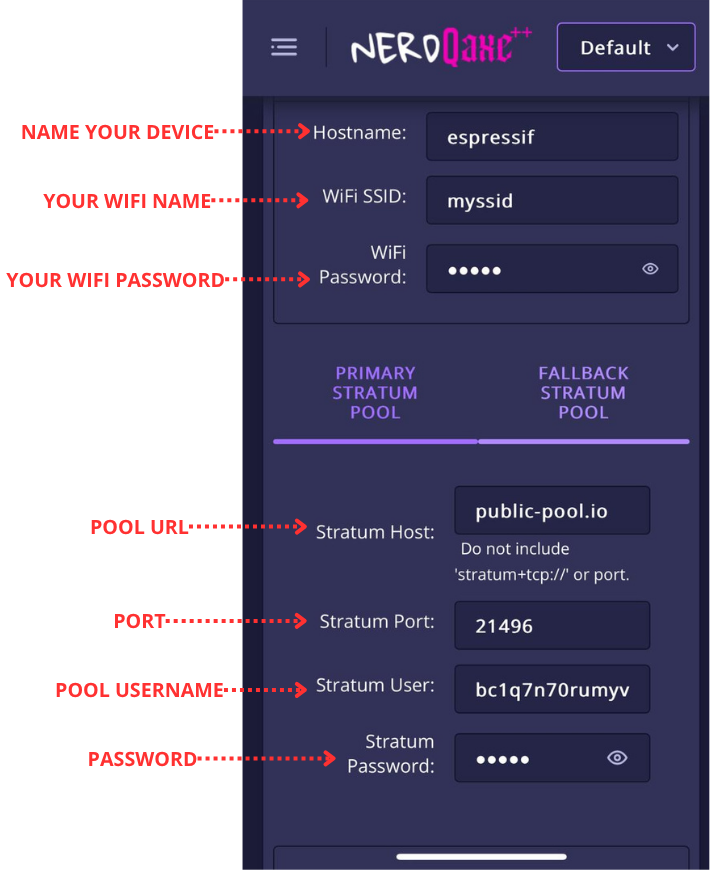
Set up your home Wi-Fi and BTC address
Step 2

Set up your home Wi-Fi and BTC address

In the portal, open the Network section and fill in:

  • SSID: the name of your home Wi-Fi
  • Password: your home Wi-Fi password
  • Pool URL and port: your pool settings, or leave the default
  • BTC address: the address where you will receive the reward

Click Save and Restart. If everything is right, the miner reboots and joins your home Wi-Fi by itself.
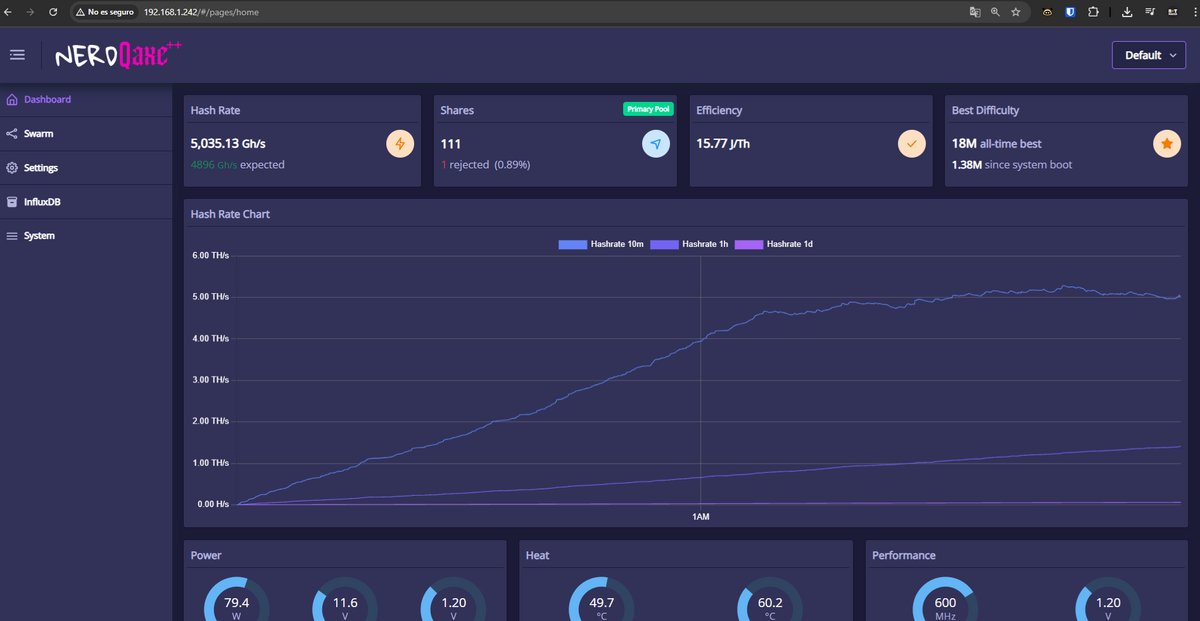
Open the miner’s dashboard
Step 3

Open the miner’s dashboard

Once it is on your network, the screen shows its local IP address, something like 192.168.1.XXX. Type it in your browser to open the dashboard (AxeOS), where you can:

  • Performance: hashrate, shares and efficiency
  • Settings: change the miner and the pool
  • Logs: see what the miner is doing
Done

You’re mining!

If you see hashrate in the dashboard, you are up and running. Pool or solo, you are now part of the Bitcoin network. Congrats!

What next

Choose how you want to mine

Mine as part of a group

Pool mining

Join a mining pool and get smaller, more frequent payouts for the hashrate you add: steady rewards without having to find a full block, which suits home miners. Braiins and OCEAN pay out over Lightning.
Good to know

The parts of your miner

What each connector and button does
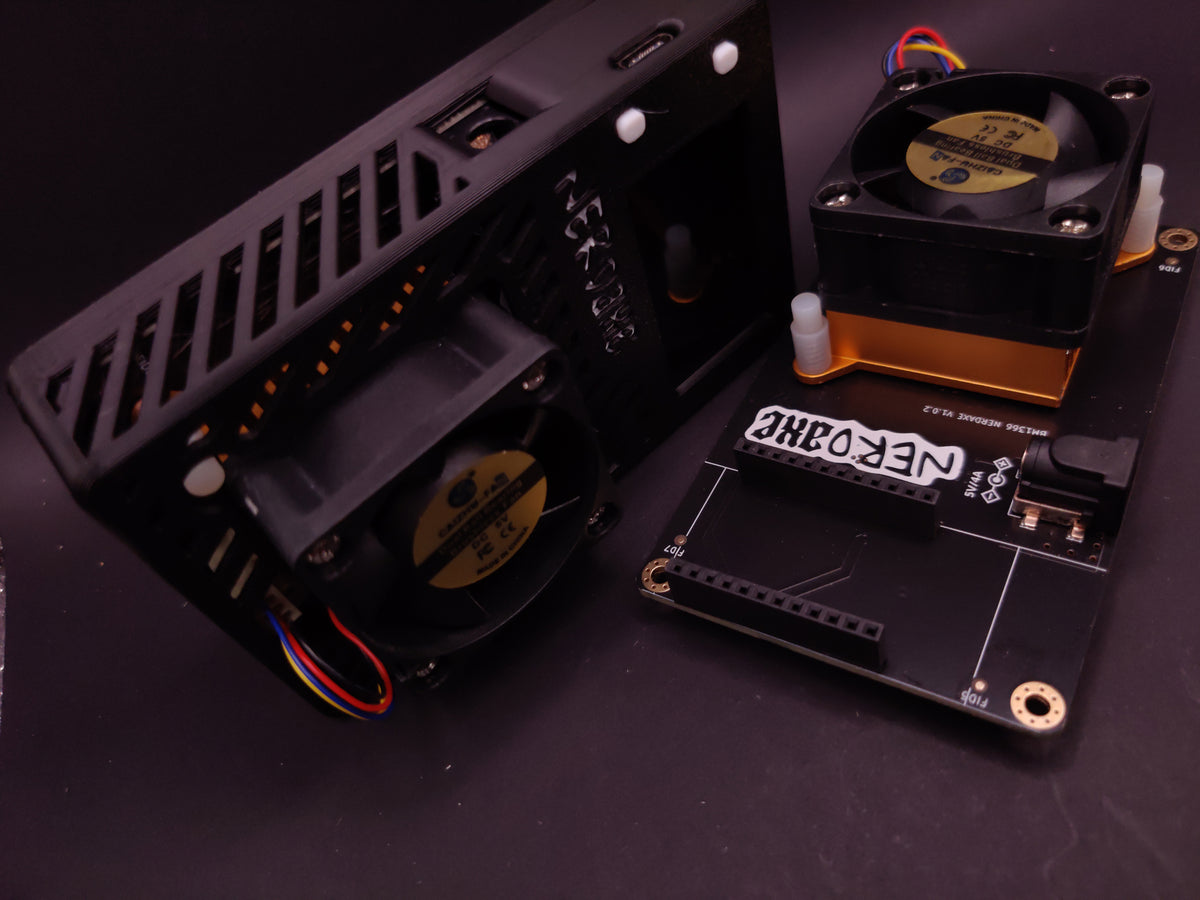
Generic miner parts

What each connector and button does

  • Power input: connect a stable power supply, and check the specs your device needs before plugging it in
  • Fan connectors: your device may have one or more fans; align every 4-pin connector properly, a wrong connection can damage control components
  • USB-C port: for flashing firmware or serial debugging. If you cannot reach AxeOS, reflash the device over USB with esptool or the Bitronics Flasher
  • Reset button: reboots the device
  • Boot button: hold it while powering up to enter flash mode
  • Fuse: overcurrent protection used on some Nerd*axe devices
Need a hand?

Still not mining?

Product guides

Each miner has its own PDF guide with all the details.

Flasher

If the dashboard will not open, reflash the firmware from your browser.