Connecting your home miner to OCEAN🌊
Why OCEAN?
OCEAN is an innovative mining pool that allows individual miners to exercise more choice and control, as well as offering payouts using the Lightning Network. Features range from offering a choice of various block templates provided by OCEAN, to using block templates served by your own node (DATUM Gateway), to the uniquely fair payout structure (T.I.D.E.S) with payouts made directly from the coinbase transaction (making OCEAN effectively the only major pool that is non-custodial). For us at Bitronics, when it comes to non-lottery mining, this pool best reflects the cypherpunk values of decentralization, self custody, individual sovereignty and censorship resistance.
Pointing Your Hash to OCEAN
Simply pointing your Bitaxe/NerdAxe to mine with OCEAN is a very straightforward process (you can see the official guide here). Below are instructions specifically for Bitaxe/NerdAxe.
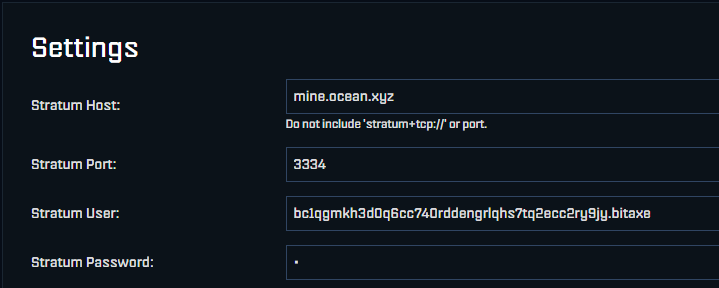
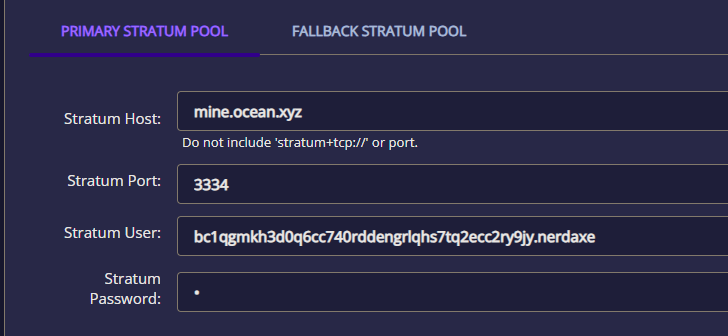
Enter the following in the settings interface of your Bitaxe/NerdAxe depending on which of the alternate block templates you prefer:
| Policy | Stratum Host | Stratum Port | |
|---|---|---|---|
| OCEAN Recommended | Includes only transactions and reasonably small data. | mine.ocean.xyz | 3334 |
| Core+Antispam | Includes transactions and limited spam. | ordis.mine.ocean.xyz | 3303 |
| Core | Includes transactions and most spam. | core.mine.ocean.xyz | 3202 |
| Data-Free | Includes only transactions without arbitrary data. | datafree.mine.ocean.xyz | 3404 |
Note that the payouts (frequency and amount) do not vary depending on which block template policy you choose. No matter which policy you choose, you are still mining on OCEAN, and there is a flat 2% Pool Fee.
(In the second part to this guide, you’ll see how you can take even further control and decrease the Pool Fee to 1% by using DATUM).
The Stratum User is a Bitcoin address controlled by you (most address types are supported). Optional worker name can be added to the User by appending “.yourworkername” to the Bitcoin address (this can help identify the specific device if more than one device is mining to the same address). See screenshots below.
Note that in order to later configure payouts with the Lightning Network, the Bitcoin wallet you’re using should have the capacity to sign messages. In the next section examples using Sparrow and Blue Wallet will be provided.
The Stratum Password is ignored by OCEAN, so it can be anything (as it cannot be left blank, we set it as “x”).
Save and restart your device. Once it starts submitting shares, it will become visible on OCEAN’s Dashboard. Scroll down and search for your Stratum User (address), as shown below.
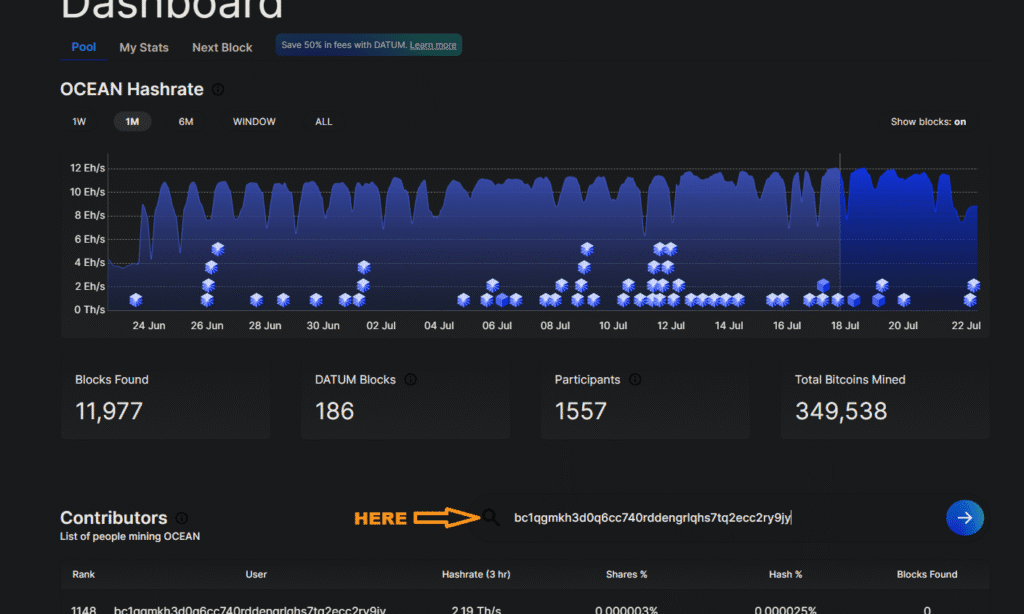
In the beginning, the hashrate is likely not to be showing accurately, the device may even appear offline, this is normal. The stats shown on OCEAN’s Dashboard will be more accurate the longer the device stays on and hashing.
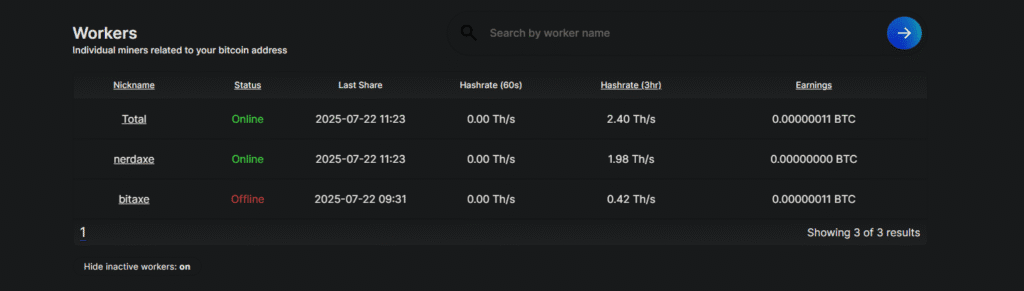
You can verify that it is actually hashing and shares are being produced from the device’s own settings interface.
If you reached this part and you see your miner on the Dashboard, congratulations, you are now mining on OCEAN!
However, just pointing your Bitaxe/NerdAxe to mine on OCEAN, you will notice that “Estimated Time Until Minimum Payout” will show as many years. That is because on OCEAN the Minimum Payout (onchain) is around 1 million sats. Hence, we must configure Lightning Network payouts to be effectively compensated for the work provided.

Configuring Payouts Using the Lightning Network
If you run your own Core Lightning node, follow the official guide provided by OCEAN here. This approach is the most complete, preserving user control and custody, and therefore it is highly recommended.
However, we understand that not every Bitaxe/NerdAxe runner will also be a Core Lightning node runner. Unfortunately, as of this writing, there are no self custodial Lightning Network wallets that don’t require you to run a Core Lightning node and are compatible with OCEAN’s BOLT12 payouts. Here we’ll show how you can set up payouts using the Lightning Network, fast and easy, although it must be stated that the following solution is CUSTODIAL, and as such, use at your own risk.
Create your CUSTODIAL Lightning Network wallet with CoinOS
1. Go to https://coinos.io/
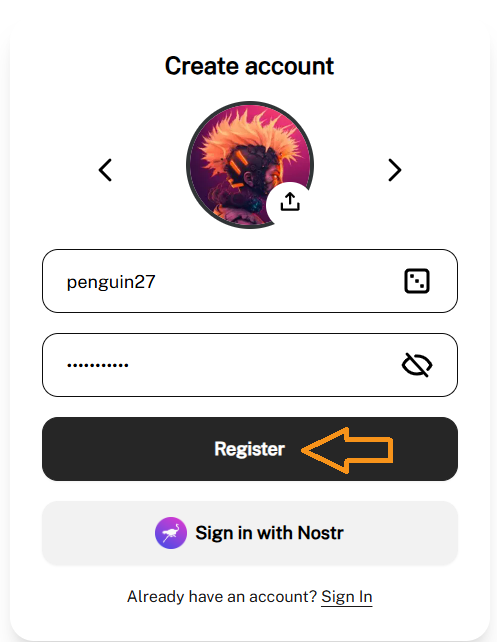
2. Click “Register” and create an account. Make sure to back up / write down your Username and Password.
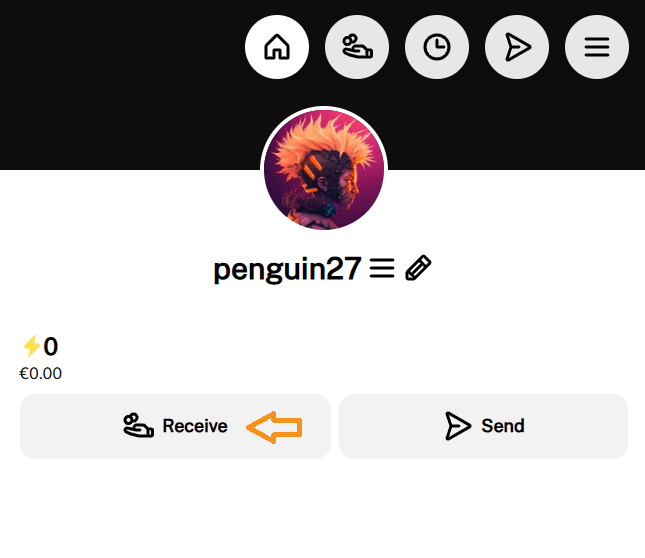
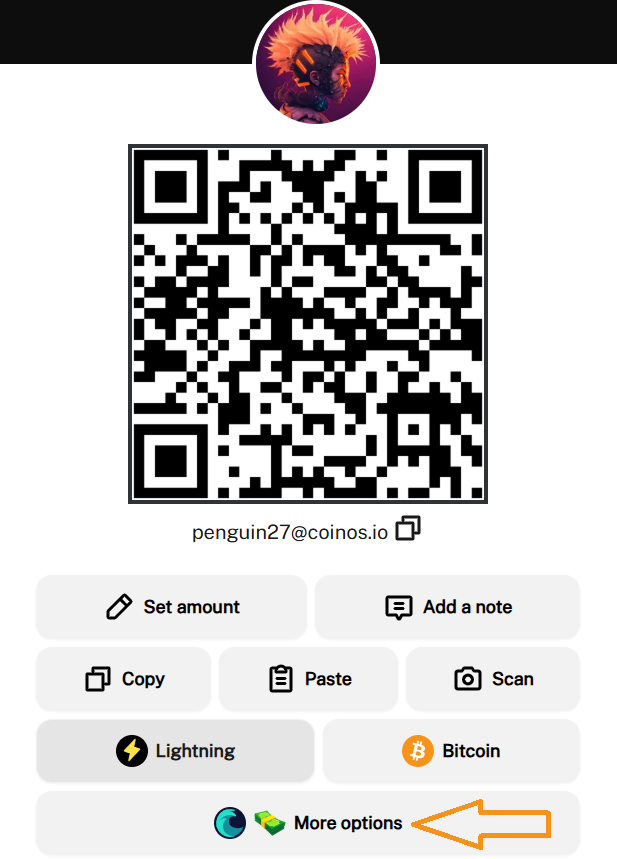
3. In your new wallet, click “Receive”. In the next screen, click “More options”.
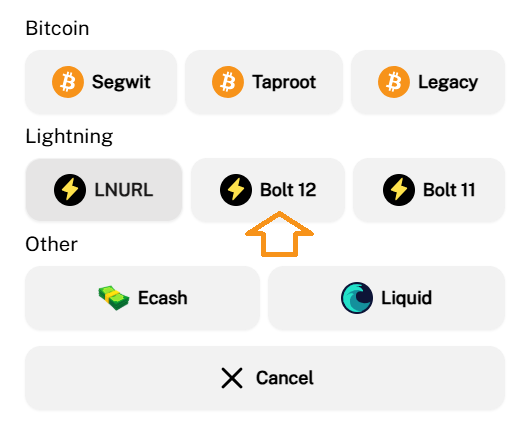
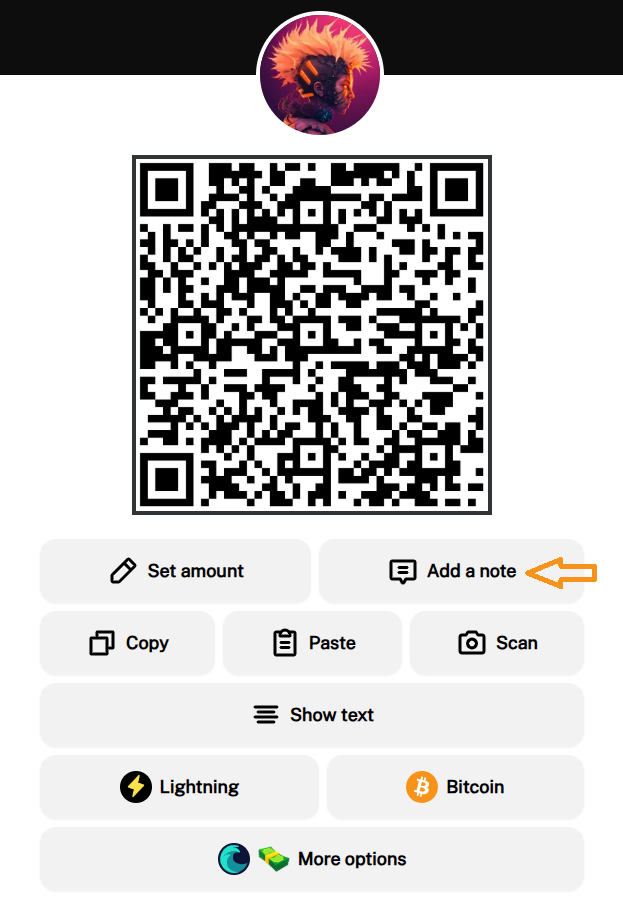
4. Select BOLT12. On the next screen, click “Add a note” and leave the window open.
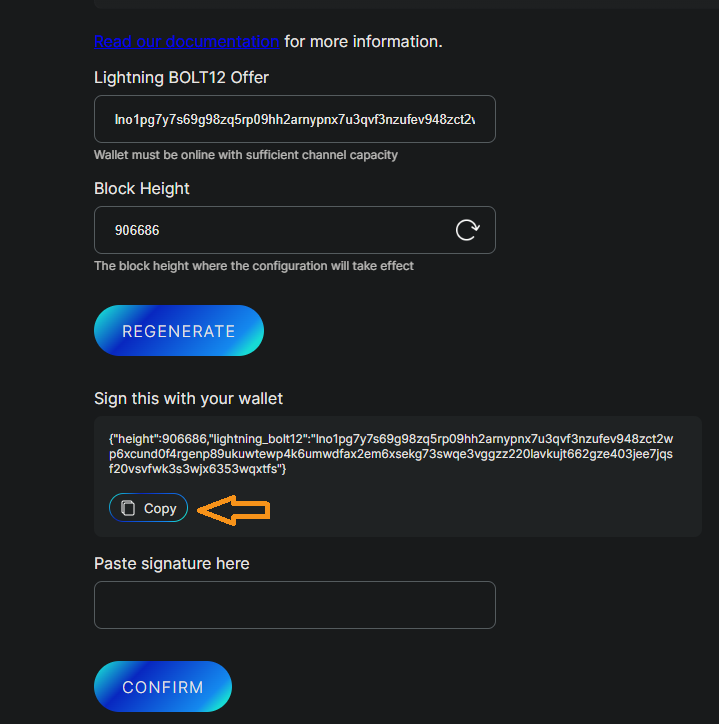
5. Go back to your OCEAN Dashboard, click “Configuration”, then copy the BOLT12 Offer Description. Leave the window open.
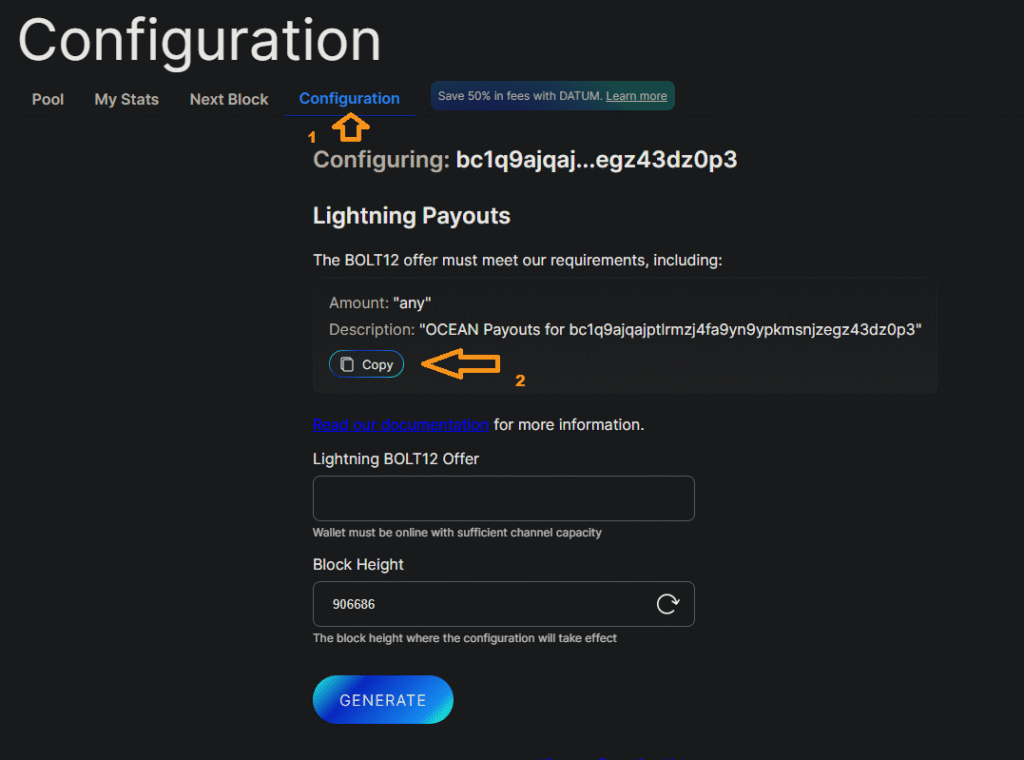
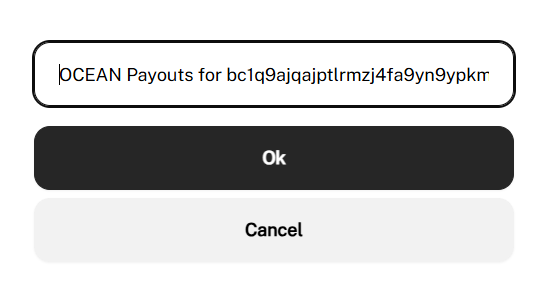
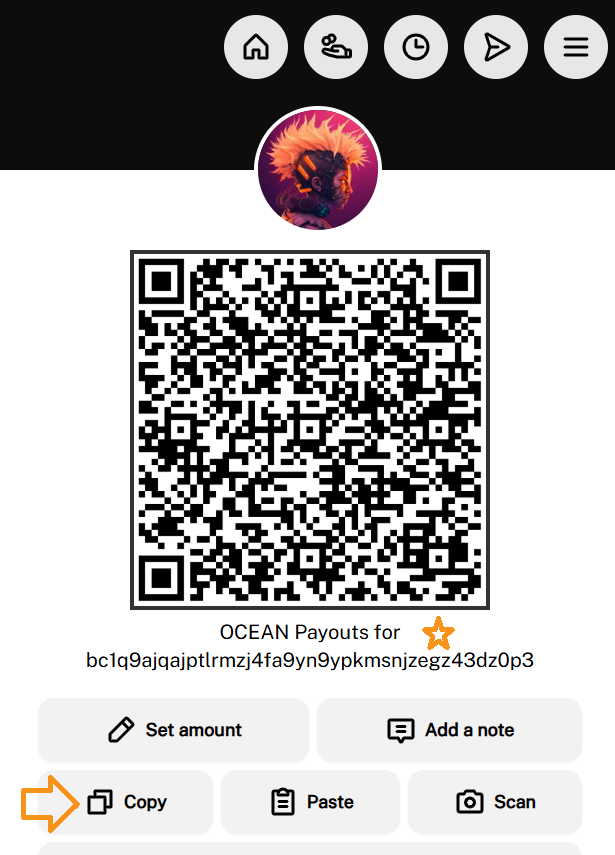
6. Go back to the CoinOS wallet and paste the copied BOLT12 Offer Description, click “Ok”. In the next screen, verify that the description (under the QR code) is correct, then click “Copy”.
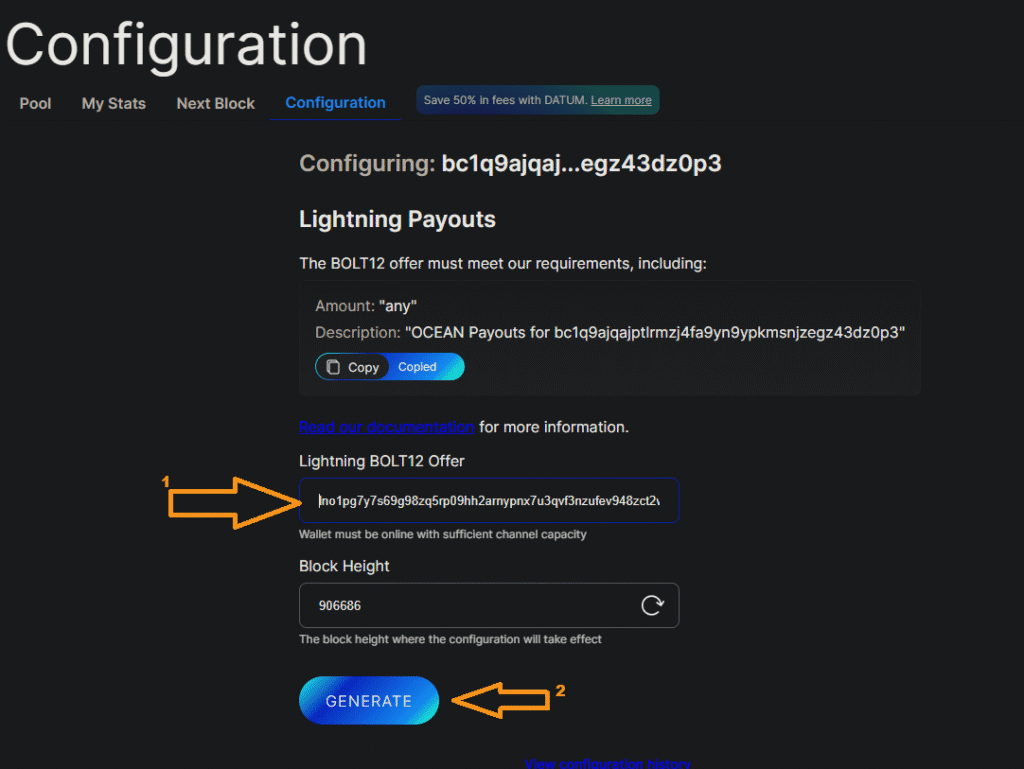
7. Go back to OCEAN Dashboard and paste the copied Lightning BOLT12 Offer in the corresponding field. Then, click “GENERATE”.
8. Copy the generated message. Leave the window open.
9. If you are using Sparrow, refer to A, and if you are using Blue Wallet refer to B.
A.
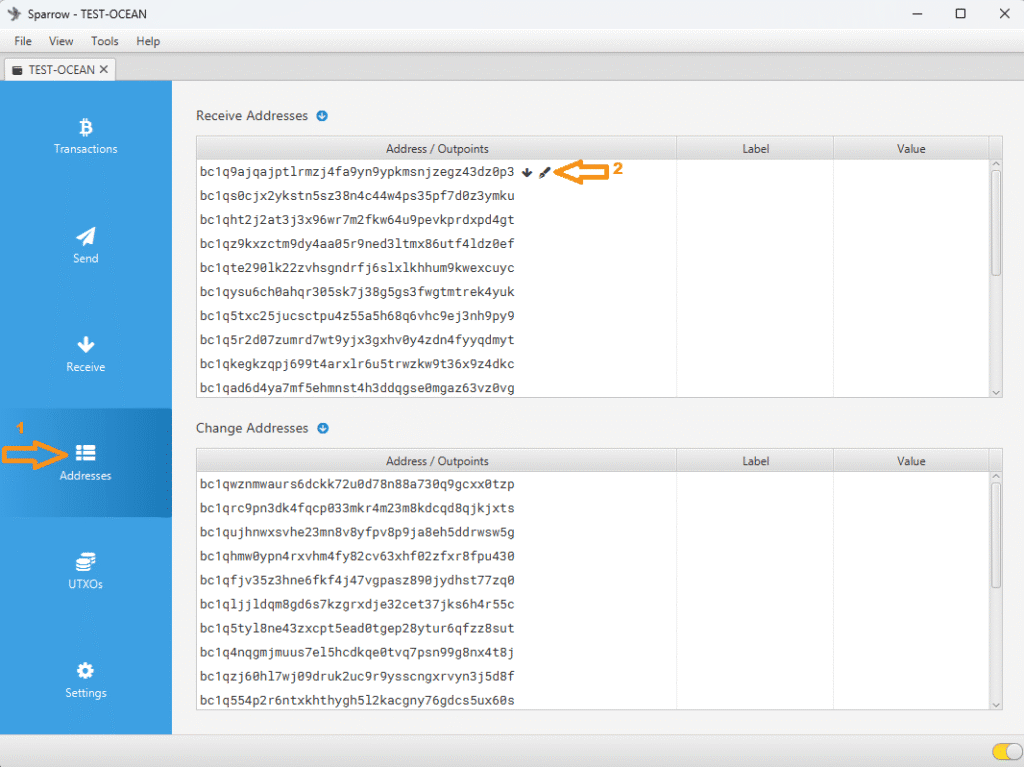
A.1 Open Sparrow and load the wallet which you used to get the Bitcoin address for Stratum User. Click “Addresses” in the sidebar on the left. Locate the address, and click the little pen symbol that appears next to it.
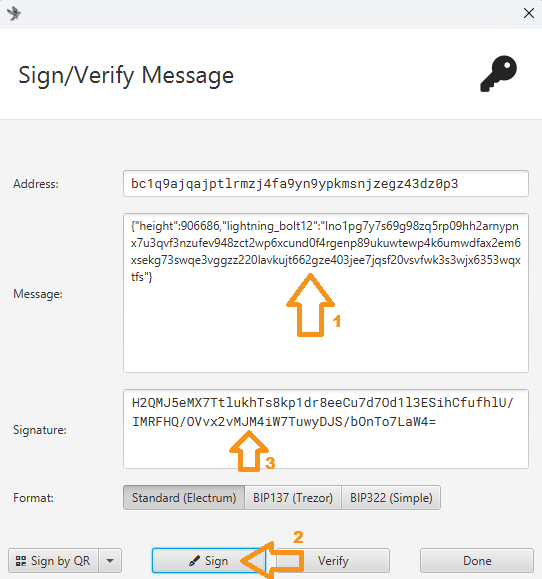
A.2 In the screen that appears, paste the message that was generated in the OCEAN Dashboard in the “Message” field, leave the default, Standard (Electrum) option selected, click Sign. The signature will be generated, select and copy it.
B.
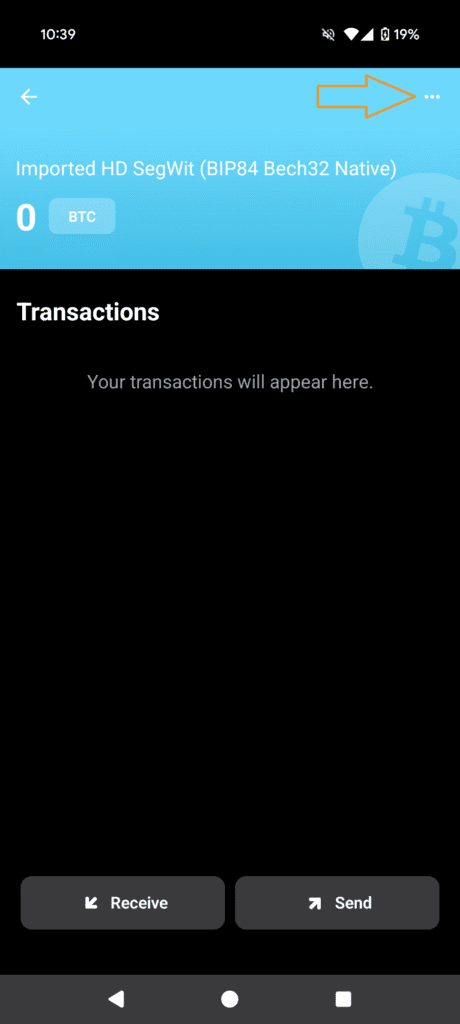
B.1 Open Blue Wallet and load the wallet which you used to get the Bitcoin address for Stratum User. Click on the three veritical dots in the top right corner.
B.2 In the wallet settings page, click on “Show addresses”.
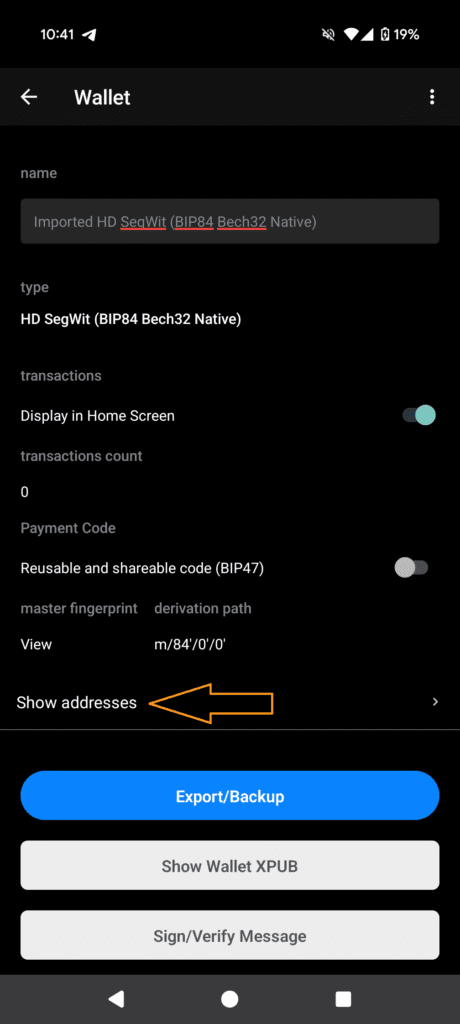
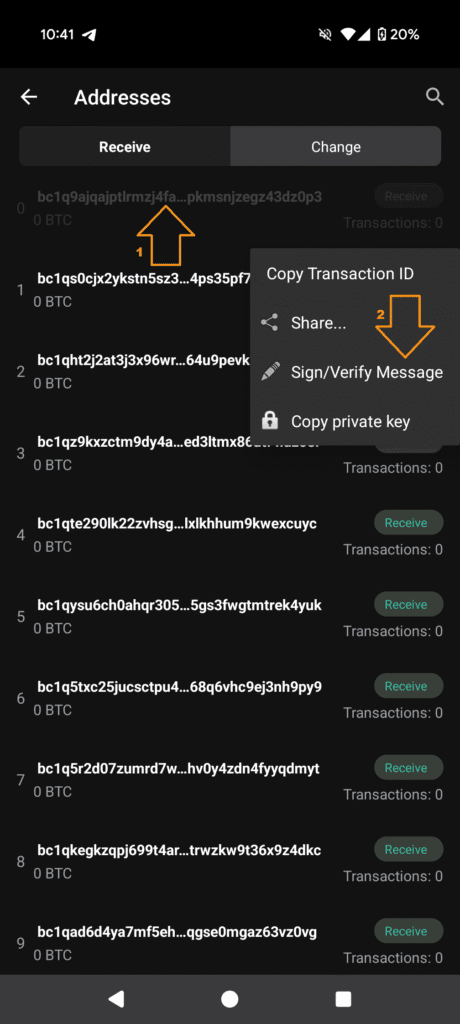
B.3 Identify the address used as Stratum User, tap and hold, then select “Sign/Verify Message”.
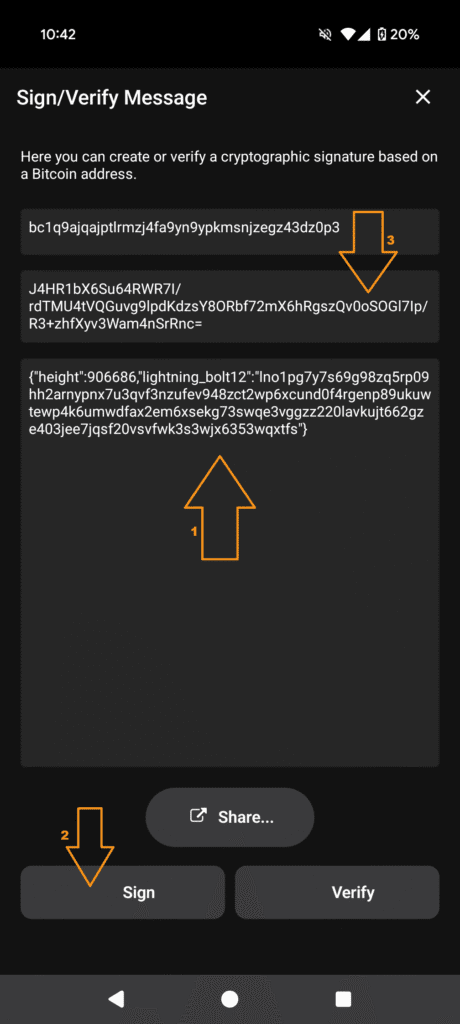
B.4 In the screen that appears, paste the message that was generated in the OCEAN Dashboard in the “Message” field, click “Sign” and the signature will be generated. Select and copy it.
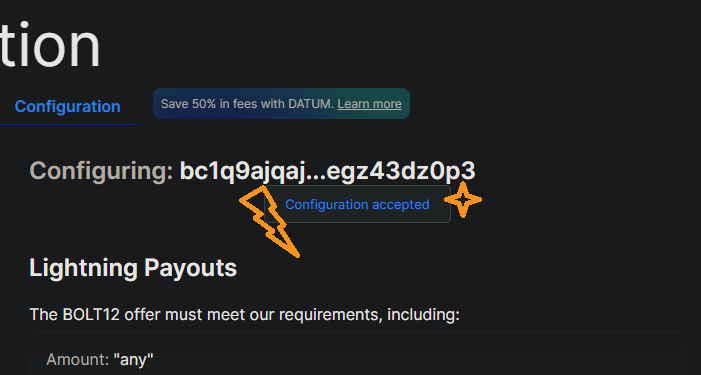
10. With the signature copied, go back to OCEAN Dashboard Configuration Page, paste the signature in the provided field and click “CONFIRM”.

If you get the message “Configuration accepted”, congratulations, you’ve now configured Lighnting Network payouts!
And that’s it for now! Check on your CoinOS wallet in a day or two. Remember, do not use custodial solutions for long term storage. Once you accumulate a significant amount of sats, transfer to a self custodial Lightning Wallet such as Phoenix, or directly onchain.
In the second part to this guide, you will learn how to set up DATUM Gateway, which will allow you to create your own block templates, that follow your own policy, using your own mempool from your own node, all while decreasing the Pool Fees by 50%.